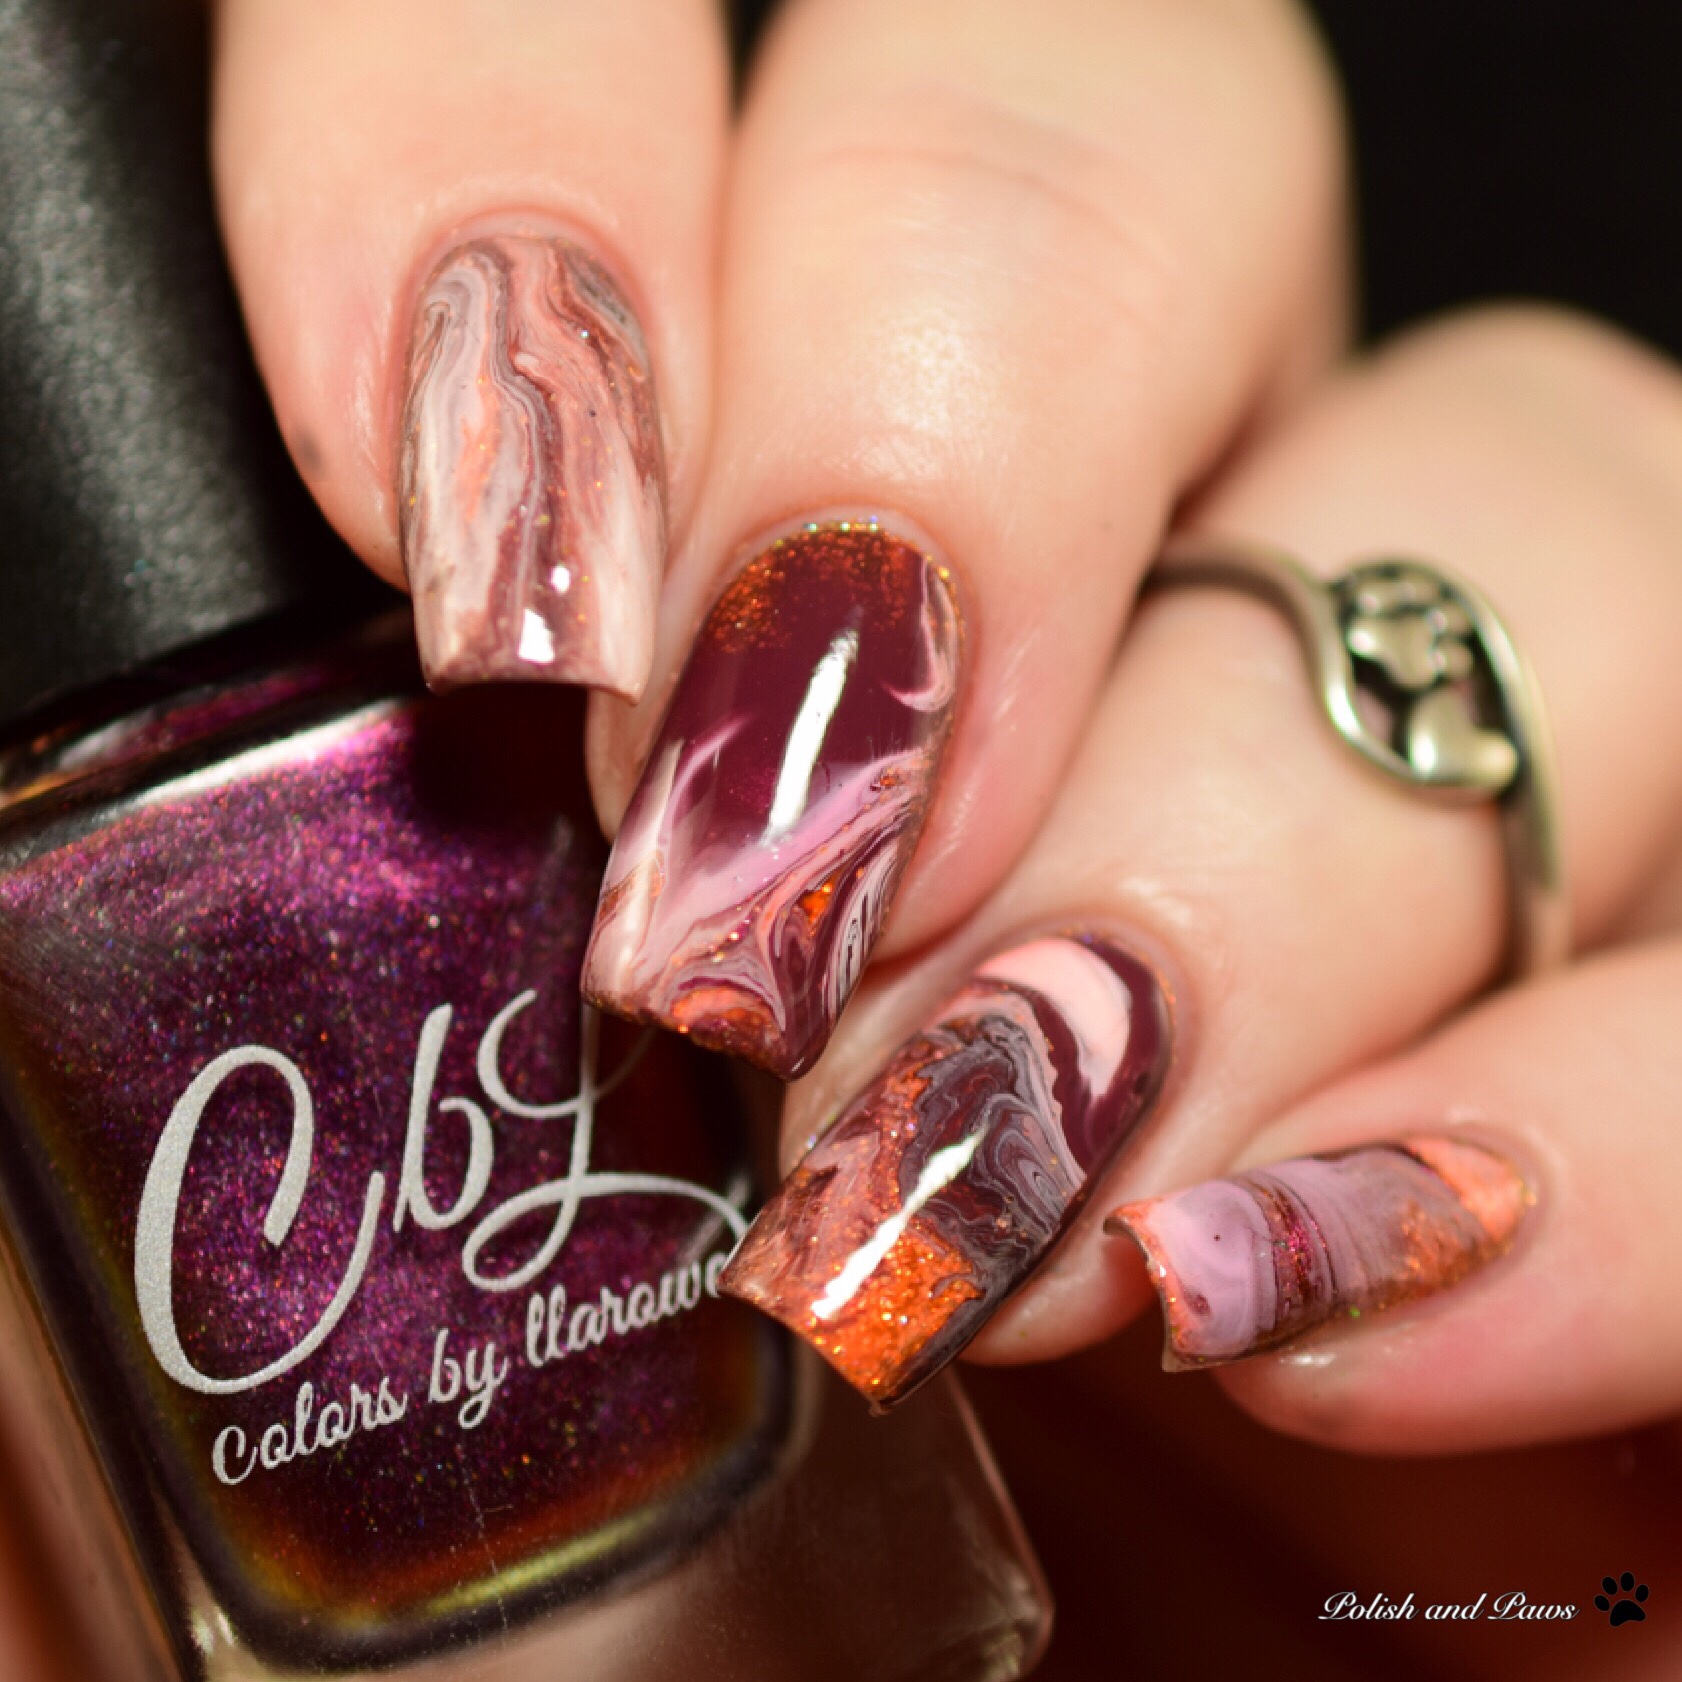
The actual process of doing a drip marble is very easy, assuming you’re accustomed to working with your own decals. Picking the colors however I think is the harder part. It’s tempting to choose colors from the same color family, but getting some contrast is really important otherwise you’ll likely end up with a murky mix of one shade where nothing stands out. I had a few polishes sitting out on my desk (who doesn’t) so I decided to start with a couple of those, one Painted Polish Stamped in Chocolate and the other Girly Bits Funky Town. I just recently got Dance Legend White Spot It and I definitely wanted to use it. From there I started looking towards reds and brick shades.


These are the polishes I ended up with:
- Painted Polish Stamped in Chocolate
- Girly Bits Funky Town
- Dance Legend White Spot It
- Zoya Marney
- Colors by Llarowe Show Me the Love


So what do you think? I am so pleased with how it turned out! In fact I already have another drip marble drying right now, with a whole different selection of colors. If you’re interested in trying a drip marble yourself pop on over to
Painted Fingertips to watch her video tutorial.
Polish and Paws: Facebook ~ Instagram ~ Twitter ~ Google+ ~ Pinterest
Until next time, stay polished!

